How to Hang Wall Art: 5 Tips for Hanging It on the Wall
To hang a piece of decorative wall art or a poster, all you need is a nail, a hammer, and a little confidence:
No more staring at empty walls—it’s time to learn how to hang decorative wall art. Maybe you love browsing flea markets for portraits of strangers, or even taking on DIY art projects to save money. However, you may not know the best way to hang wall art, so it stays sitting on the floor waiting to be displayed. Whether you want to create a gallery wall or simply hang a single artwork for a minimalist effect, the instructions are essentially the same.
Grab your hammer and nails, and follow these simple tips to learn how to hang wall art like a pro.
Step 1: Decide on a Strategy
Although you can probably hang your wall art on almost any wall, consider the weight, size, and shape of the item you want to hang, as well as the material of your walls, before picking up the hammer. Can I drill into brick? Tile? Can my drywall support this weight, and what exactly is a stud? We’ll walk you through the most common best practices for hanging wall art.
Step 2: Gather Your Tools
You know you need a hammer, a tape measure, and a pencil to hang photos or wall art on the wall, but other tools will also come in handy. Before you begin, make sure to add them to your toolbox. For plaster or drywall, the weight of the item will determine exactly what you need.
For hanging lightweight wall art:
- The best way to hang lightweight wall art is to invest in a pack of small nails.
For medium-weight wall art:
- If it weighs more than a few pounds, add a few picture hangers to your cart.
For heavier wall art:
- A heavy piece of wall art or a heavy mirror will require a large nail, a stud finder or wall anchors, suitable screws, and a screwdriver.
If you are hanging wall art on acrylic glass or glass, you will need good-quality, low-profile adhesive hooks rather than nails and screws, and if you are hanging on brick, use brick clips.
For all wall art:
Before you begin, check the back of the picture to see what type of hanging hardware you’re working with. If you turn the frame over, you’ll usually find hanging wire, D-rings, or a sawtooth hanger. Even though this shouldn’t cause you too much trouble, be sure not to buy nails that are too large for your D-rings, for example.
Step 3: Make a Plan
- Beautifully arranged framed photos can bring a whole new dimension to your interior decor, but if you don’t know how to arrange them, you may find yourself in a mess. The best way to hang photos doesn’t follow one unbreakable rule, but there are some helpful guidelines.
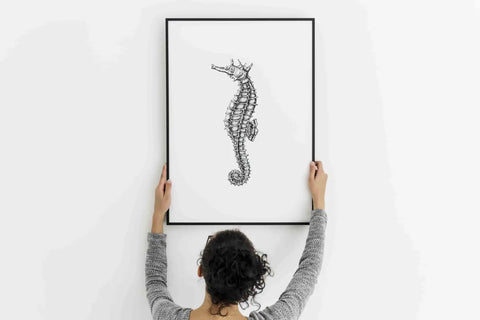
The center of a framed artwork should be 140cm above the floor—the average eye level and the height at which galleries and museums usually hang their pieces. Mark the height with a pencil, then measure to find the center of the wall from one end to the other, and mark where the two points meet. That’s where the center of your artwork should be!
Now, measure the distance between the center of the artwork and the point where it will hang on the nail (either where the picture wire catches when pulled taut to support the weight, or where the sawtooth hanger is located). Measure this difference from your midpoint on the wall: that is where the nail (or picture hanger, wall anchor, or brick clip) will go. Mark this spot.
You can also use painter’s tape to map out your wall before making holes. Start by measuring the frame or frames, then cut and hang painter’s tape to size to get an idea of what the wall will look like with your chosen arrangement. There are even apps you can download to visualize what your wall will look like when you’re finished.
Like many things in interior design, hanging artwork is subjective, so if you love your arrangement regardless of the advice, go for it.
Step 4: Hang Your Wall Art
- Now that you’ve marked the exact location of your nails, picture hanger, or wall mount in pencil, it’s time to hang the item. If you are hanging a very heavy piece, first use a stud finder to locate a stud and check whether it is in a logical place for your nail. If it is, drive in a large nail and you’re done. If the stud is in an awkward spot, use the anchor-and-screw method instead: Drill a hole, place the plastic wall plug in it, then screw a screw into it, leaving it protruding just enough so you can loop the wire or sawtooth hanger over it as you would with a nail.
Step 5: Get Creative with Your Display
If you don’t feel like using hammers and nails, simply lean it. The easiest way to display artwork is also the best for anyone afraid of hammering nails into the wall: Lean the frame against the back of a chair, against the wall, or on a shelf. Even homes with plenty of artwork hung on the walls benefit from a few casually propped pieces—they look intentional.
If you’re always rearranging your home, consider a picture ledge.
If you’re an organizing enthusiast and want to create a dedicated space for this, consider adding a shallow picture ledge in one of your rooms. It’s the perfect solution for anyone who constantly changes style (or has caught the redecorating bug).
If you like the idea of sparing your precious walls from holes, but want a more formal look than leaning pieces, consider a picture rail: This is a piece of molding that runs up near the ceiling, from which you can hang your artwork using hooks and cords, then change it whenever you feel like it.
Leave some pieces unframed
- You may have collected some of those panel paintings from the flea market—charming chipped edges and all—and want to preserve a little of that character without paying for a fancy floating frame. Or maybe you simply want to hang paper drawings and leave it at that? It is absolutely possible, and even encouraged, to leave artwork unframed. Just follow these tips and gather the supplies you need to hang them effortlessly.
Break a Few Rules
- When you’re thinking about the scale and placement of your artworks, and wondering whether to lean them or frame them, take a deep breath. Our favorite hanging rules are also made to be broken. Now go display all your artwork.